Kage Studio is a 2D vector animation software that lets you create vector and even hand drawn cartoons and animations. It is free to use and open source as well.
Overview
Kage Studio is a 2D animation software. It is an open-source software developed by a lone developer, me. Kage Studio aims to provide a simple and user-friendly platform for creating 2D animations. It includes features such as onion skinning, keyframes, layer management, and the ability to import PNG files. Kage Studio supports Windows, Mac, and Linux operating systems. As an open-source software, its source code is freely available for users to access, modify, and distribute.
 |
| Kage Studio v0.7.221227 |
System Requirements
Memory
If your Operating System can comfortably and smoothly run Windows 10 or 11, Mac OS 12 Monterey, or Ubuntu 20.04 Focal Fosa, you should be fine. Kage Studio has a memory footprint of 50MB.
Disk Space
Kage Studio itself is just a little over 2MB, but together with Gtkmm library and FFMPEG, Kage Studio would require about 120MB of disk space,
Admin Access
Admin privilege is not required on Mac, and is optional for Windows and Linux. Read more on Installation.
Installation
Windows
On Windows, you can down the ZIP file and simply extract the content on a folder access Kage Studio from that directory each time you need to use it. The Installer would require admin privilege to install shortcut to Start Menu and associate KSF file to open with Kage Studio.
Mac
On Mac, the APP file can be ran without admin access.
Linux
On GNU/Linux, you don't need admin privilege to compile the source code and use Kage Studio, but the DEB package for Debian and Ubuntu distro would to run
sudo dpkg -i kagestudio_{version}_amd64.deb
Features
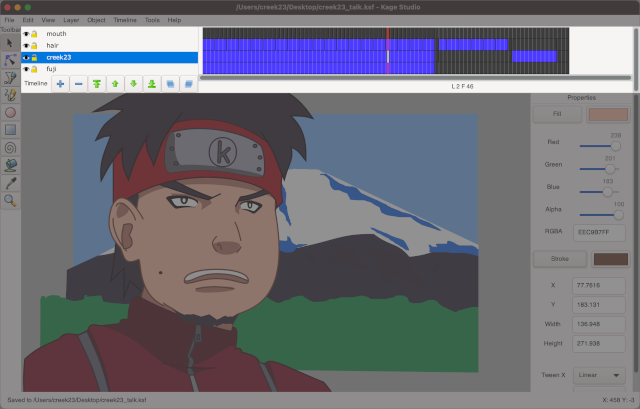 |
| Kage Studio's Timeline Pane |
Keyframe
Keyframes are specific frames within an animation where a change in an object's property or attribute occurs. They mark important points in the animation timeline that define the start and end of a transition or movement.
In animation, instead of drawing every single frame, animators create keyframes to represent significant moments in an object's movement or transformation. These keyframes serve as reference points from which the Kage Studio interpolates and generates the intermediate frames to create smooth animation between the keyframes.
Keyframes can be used to control various attributes of an object, such as position, scale, opacity, and color. By placing keyframes at specific intervals, animators can define complex movements, transformations, and effects within an animation.
Tweening
Tween, short for "in-between", is a technique used in animation to create smooth transitions between keyframes. It involves generating intermediate frames automatically based on the keyframes set by the animator.
When animating, animators typically define keyframes that represent the most important positions or poses in an animation sequence. Tweening fills in the gaps between these keyframes by automatically generating the frames needed to create a smooth transition from one keyframe to another.
There are different types of tweening methods used in animation:
Positional Tween
This type of tweening interpolates the position of an object between keyframes, smoothly transitioning it from one point to another. It calculates the in-between positions based on the distance and timing specified by the animator.
Tweening saves animators from having to manually draw every frame in an animation sequence, significantly reducing the workload. It helps create seamless and fluid motion, making animations appear more natural and polished.
Kage Studio includes built-in tweening capabilities that automate the generation of intermediate frames. Animators can specify the duration and easing functions for the transitions to control the timing and style of the tweens.
Shape Tween
Shape tweening is used for morphing between different shapes or forms. It allows animators to transform one shape into another gradually, creating fluid morphing effects.
Color Tweening
Color tweening is used to create gradual color transitions or fades between different colors. It enables animators to smoothly change the color properties of objects over time.
Alpha Tweening
Alpha tweening, or opacity tweening, allows animators to smoothly adjust the transparency or opacity of an object, creating gradual fade-in or fade-out effects.
Onion Skinning
Onion skinning is a technique used in animation that allows artists to see multiple frames or keyframes simultaneously. It is called "onion skinning" because the frames are overlaid on top of each other like layers of an onion.
With onion skinning, artists can see the previous and/or subsequent frames as a reference while working on the current frame. This visual aid helps in maintaining consistency in movements, timing, and spacing during the animation process.
Typically, onion skinning shows the previous and next frames as translucent outlines or silhouettes, with the current frame being the one actively worked on. This allows animators to compare the current frame with adjacent frames, making it easier to create smooth transitions and maintain the desired motion.
By enabling animators to see multiple frames at once, onion skinning helps in achieving fluid and natural-looking animations. It is a valuable feature in animation software for ensuring accurate movement and motion flow.
Layer Management
Layer management allows users to organize and control the stacking order of visual elements within Kage Studio. It provides a way to manage and arrange different elements of the animation on separate layers, similar to how transparent sheets are stacked in traditional hand-drawn animation.
In animation, each layer represents a separate level or plane where specific elements or assets are placed. For example, you may have a layer for the background, a layer for characters, a layer for special effects, and so on. By separating elements onto different layers, animators can manipulate and animate them independently while maintaining their relative positions.
Layer management offers several advantages in the animation process:
Organization
It helps keep the animation project structured and well-organized. Each layer can contain related elements, making it easier to locate and work with specific parts of the animation.
Control
Layers provide control over the visibility, opacity, and blending of elements. Users can adjust the order of layers to determine how elements interact with each other visually.
Efficiency
Working with layers allows animators to make changes or adjustments to specific elements without affecting the rest of the animation. This saves time and effort by isolating modifications to specific layers.
Flexibility
Layers enable animators to create complex scenes by combining and separating elements as needed. Elements on separate layers can be independently animated, providing flexibility in the animation process.
Export to HTML5
Once you are done with your animation, or even just a single frame drawing, you can export your artwork to HTML5 and have it rendered on your webpage and make it alive with your animation.
Your drawing will be converted into JavaScript to render on HTML5 Canvas. And most browser already supports HTML5, no need for third-party plugin like back in the day where you have to install Flash Player and such.
This means, your animation will be viewable on both Desktop and Mobile (smartphones, of course).
Export Video
Thanks to FFMPEG, Kage Studio can export to just about any video format. Although, as of v0.7.22, Kage Studio exports to AVI video format. But if you compile the source code now, you will be able to export to MP4, Matroska MKV, Quicktime MOV, and OGG.
Export PNG
You can also use Kage Studio to export your drawings to PNG and maybe use it on 2D Game -- here's a tutorial on how to use Kage Studio to create your game spritesheet.
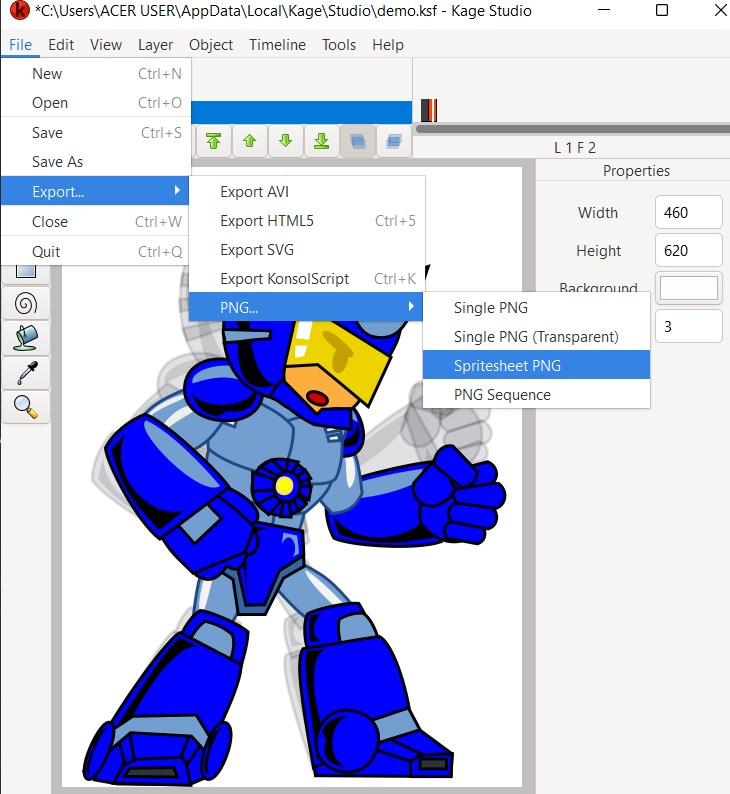 |
| Exporting to Spritesheet |
Export SVG
Just as exporting to HTML5, you can export to SVG and use the SVG on your webpage.
Export KonsolScript
Yes, you can use Kage Studio to create your game cutscenes and export to KonsolScript. After all Kage Studio started as a tool for use with Quixie and KonsolScript.
Summary
- Kage Studio is multiplatform and runs on Windows, Mac, & GNU/Linux.
- Kage Studio is completely free and open source. Free as in free beer, and free as in freedom.
- Lightweight with just 50MB of memory footprint
- Kage Studio supports tweening which is a vital technique in animation that enables the creation of smooth and appealing motion between keyframes, enhancing the overall quality and efficiency of the animation process.
- Kage Studio supports Layer management that enhances the workflow and provides control over the visual composition of an animation. It enables animators to create intricate and visually appealing animations with ease.
- With Kage Studio you can create drawings, 2D animations, and 2D game sprites.
- It is a beginner friendly 2D animation tool perfect for aspiring animators, with easy PNG import and multiple export capabilities.